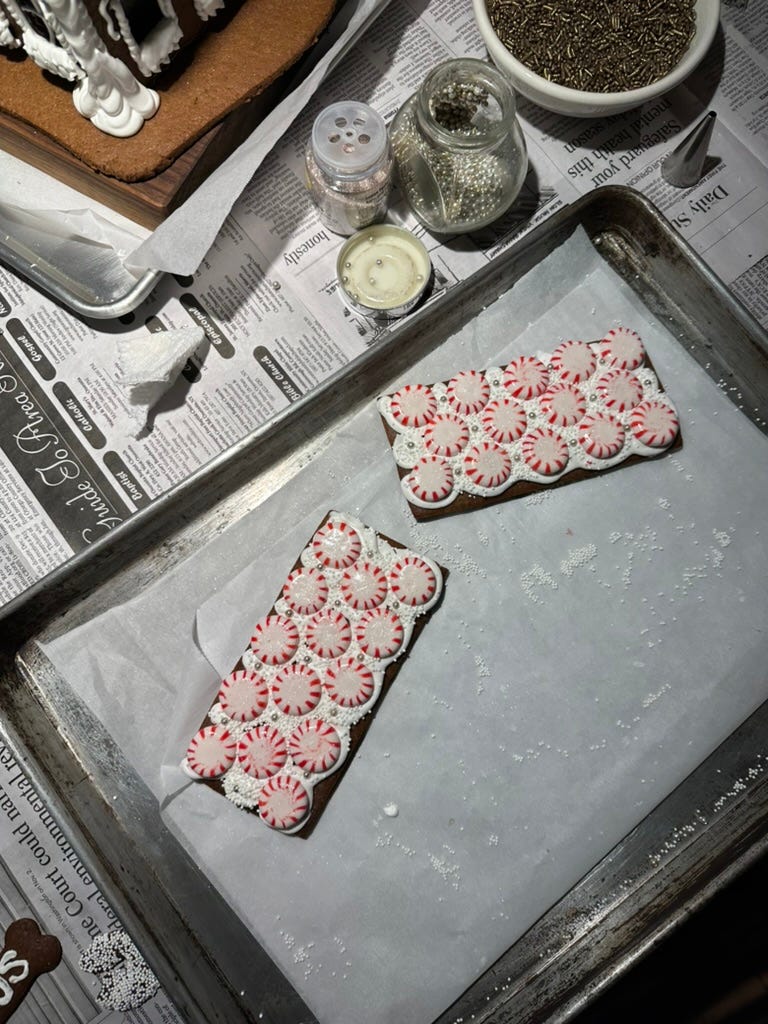
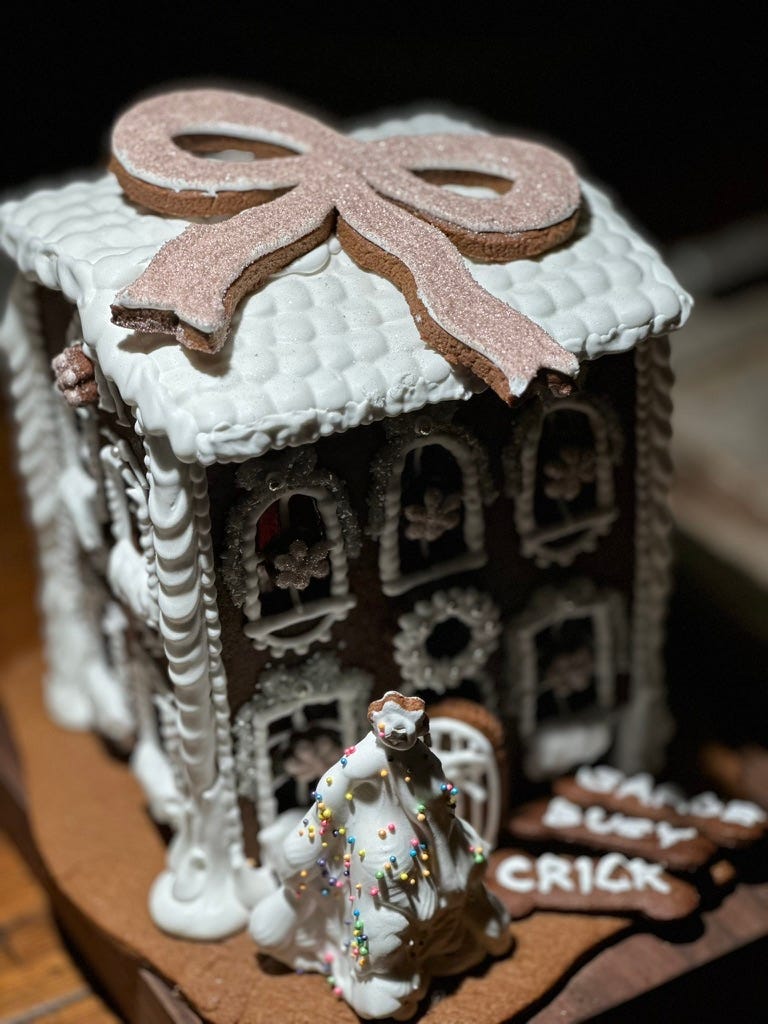
As much as I love Thanksgiving (and I really love Thanksgiving), Christmas has always been my favorite holiday. If you’ve scrolled on Instagram lately you might have seen some reels about how typically mom’s are the ones who are responsible for any Christmas magic kids felt growing up (don’t forget to fill a stocking for mom!), and mine was no different. These days, I’ve taken my moms Christmas joy and dialed it up to an 11, practicing the same traditions we did as a kid (yearly nutcracker viewing, caroling, etc.) and added a few of my own.
For the third year, I hosted friends this weekend in a marathon of gingerbread house decorating. What this entails is me spending a solid 12 hours in the days leading up to this event to make sure everyone has the sides, roofs, and extra decorations to make their dream mojo dojo casa house, and that all (all!) they have to do upon arrival is decorate and assemble. The first year we did this my friend Lisa said, “how long do you think this will take? Two, three hours?” And I literally laughed out loud and told her to buckle up and prepare for at least eight hours. Actually, this year only took us five hours, but still, it’s a commitment.
Listen, I know this insanity is not for everyone (three of my friends politely said under absolutely no circumstances would they be joining us). If you’re ready to have the most fun ever/laugh/cry/and put your creativity on full display, read on for everything you need to know about making your own gingerbread house.
And here are some tips and tricks I’ve picked up after three years of gingerbread house making:
For your sanity, I would highly recommend doing this process over a few days. It helps having everything baked off a few days before you’re ready to decorate.
Plan on setting aside at least 6 to 8 hours to dedicate to the assembly and decoration of your gingerbread house. The gingerbread must be fully cooled before you decorate it, and the house must be fully decorated before you assemble it.
Before you start baking, have your gingerbread house stencil ready to go. There are dozens of printable template options that come up with a quick Google search. If you want to make it easier on yourself, cut the stencil out of cardboard (not paper) to really get an even edge.
Speaking of preparation, I bought new piping tips for the occasion. You don’t need to go that far, but make sure you have clean tips and piping bags at the ready.
This is the one time of year you should use wax paper. Your life will be approximately 1,000 times easier if you roll out the dough between wax paper.
Consider what surface you want your house to go on. This recipe yields enough dough to create a gingerbread surface for your gingerbread to sit on (and decorate!).
For that stained glass window look, crush up hard candy (I use Jolly Ranchers) and sprinkle them in cut outs.
Get creative with decorations! Shredded wheat on the roof can give a thatched roof appearance. Sliced almonds can create a shingled roof or elegant path. Shredded coconut looks like snow. You could make a fence out of pretzels! The possibilities are endless.
While you can use royal icing to hold the sides of your house together, I would strongly suggest a caramel instead. Caramel is more finicky, but it’ll harden almost immediately making assembly a much lower lift.
Scroll to the bottom of this post to find this exact template to make your own gingerbread townhouse.
Makes 2 gingerbread houses, plus enough for a base and cut-outs. For a smaller house, halve the dough. You can also use this recipe for cookies.
Ingredients
Gingerbread
7½ cups all-purpose flour
¾ cup granulated sugar
1 tablespoon ground cinnamon
1 tablespoon ground ginger
2 teaspoons baking soda
2 teaspoons nutmeg
1½ teaspoons kosher salt
3 sticks (24 tablespoons) unsalted butter
1 cup molasses
1 cup light brown sugar
3 large eggs, beaten
Royal Icing
6 egg whites, at room temperature
1½ teaspoons cream of tartar
6 cups powdered sugar
Directions
Make the gingerbread: Preheat the oven to 350˚F.
Add the flour, sugar, cinnamon, ginger, baking soda, nutmeg, and salt to a large bowl and whisk to combine.
Add the butter to a large pot and set over medium-high heat and melt. Add the molasses and bring to a low boil. Remove the pot from the heat.
While whisking, add the brown sugar and eggs until combined.
Carefully add the dry ingredients, and stir with a spatula to combine. The dough will not be fully combined at this point. Transfer the mixture to a large bowl, and carefully (the mixture will be warm to the touch!) use your hands to finish combining the ingredients until smooth.
Immediately cover the dough with plastic wrap to prevent it from drying out. Once the gingerbread dries out, it’ll be nearly impossible to bring back to life. The gingerbread is easiest to roll when freshly made.
Cut two 1 1/2-foot sheets of wax paper. Place a small portion of the dough between the wax paper and use a rolling pin to roll out to ¼-inch. Use your stencil to cut out your desired shapes. If the wax paper becomes too worn between uses, use a fresh sheet.
Pro tip: to ensure the shapes stay in place, place the wax paper with the gingerbread on a parchment paper-lined baking sheet on pop in the freezer for at least 10 minutes to chill. You can cut out all the shapes and keep piling them on top of eachother, making sure there are sheets of wax paper between to prevent them from sticking.
Carefully transfer the gingerbread to a parchment-paper-lined baking sheet.
To make stained glass windows, add a few pieces of crushed hard candy, such as Jolly Ranchers, to the openings of the windows.
Bake the gingerbread until puffed and the candy has melted, about 12 to 14 minutes. Let the gingerbread cool on the baking sheet for at least 15 minutes before carefully transferring it to a wire rack to finish cooling. The gingerbread must be cooled completely before decorating.
Continue with the rest of the dough, covering the remaining dough with plastic wrap each time. At this point, you can pause and keep your gingerbread pieces on a baking sheet until you’re ready to start decorating.
Make the royal icing: In the bowl of a stand mixer fitted with the whisk attachment, add the egg whites and cream of tartar. Whisk on medium-high speed until the egg whites are foamy and starting to thicken, about 3 minutes. Add the powdered sugar scoop by scoop and continue mixing until stiff peaks form, about 5 minutes. Royal icing can be kept in the refrigerator covered in plastic wrap until ready to use.
Decorate the house: Transfer the royal icing to a piping bag fitted with a small round tip. Be sure to test it out before you start decorating. The smaller the tip, the easier it is to use for decorating.
Decorate all the sides of the house before you begin to assemble. Let the icing dry completely before you assemble.
Assemble the house: I’ve found that using caramel is 100 times easier than royal icing to get the structure in place. However, the choice is yours. If you're going to make caramel, wait until ready to assemble to make it as the caramel needs to be piping hot. While you can reheat it, you don’t want the caramel to burn so it’s a bit of a timing dance. The caramel will harden almost instantly once it touches the gingerbread so have your base ready on a tray or baking sheet ready to go. Start with dipping the back of the bottom of the house in the caramel and work on assembling from there. Here’s a recipe for caramel.
Continue decorating the house and surface with your desired candies of choice.
Congratulations, you made your very own gingerbread house! While the house is completely edible, I’d recommend displaying it for at least a day (if not more) to admire all your hard work.
As a bonus for paid subscribers, my friend Meagan MADE a gingerbread house template (the same we used for this shape!). The templates are on standard 9x11-inch paper so you don’t need to worry about resizing. You’ll get the house, a base, and extra cut-outs (like trees, wreaths, a front door, and window sills.
Keep reading with a 7-day free trial
Subscribe to Side Dish to keep reading this post and get 7 days of free access to the full post archives.


