

Strawberry Cherry Pie!
Strawberry Cherry Pie!
And all the tips to make the best pie possible


This weekend I participated in a local pie auction and thought that this was my yearly opportunity so share my love of pie, as well as tips I’ve gathered along with way, with you. For the occasion I’m bringing back one of the first newsletters I wrote back in 2021 which was all about pie tips and tricks I learned after spending a summer helping one of my closest friends, Maggie, with her pie business.
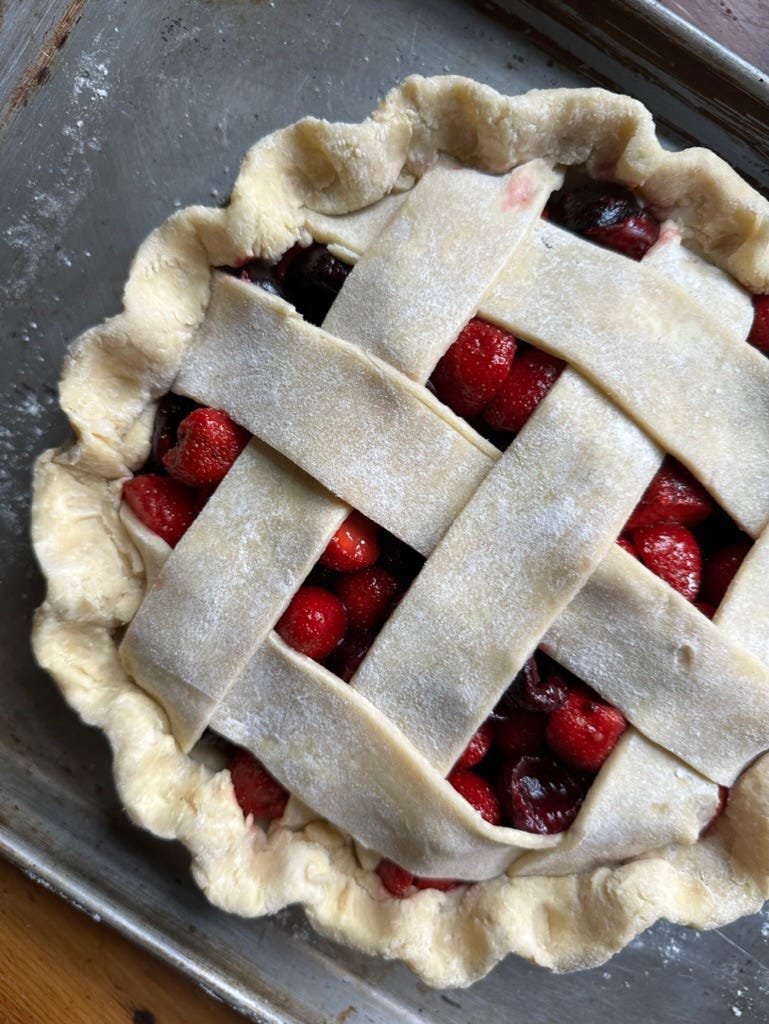
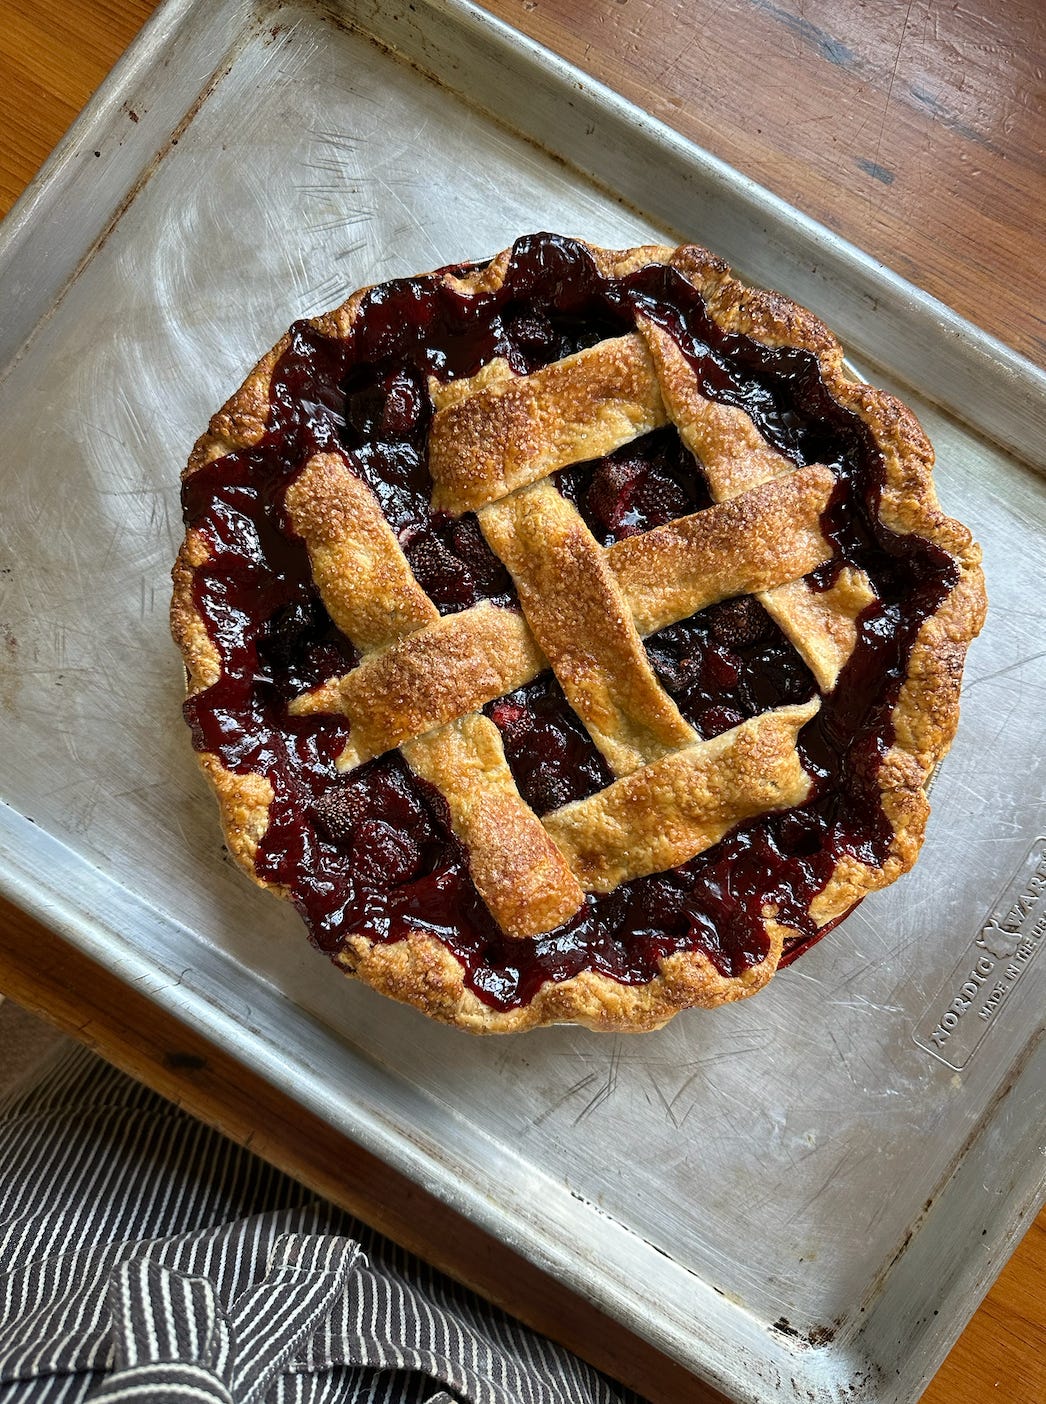
For the auction I made a strawberry cherry pie to take advantage of what was available at the market, but you can use this recipe (and tips!) for just about any pie you make, sweet or savory. Happy baking!
Tip 1: Stay Hydrated
Good for you if you’re tracking your water intake, but we’re talking about dough here. Most recipes for pie (including ones I’ve written) call for chilling the dough for 1 hour in the refrigerator. As I started my pie-baking journey, I wondered why the dough I made at home was so different from Maggie’s dough since it was the same exact recipe. While my dough would roll out, it would sometimes crack along the edges, and I would have to patch it back together. Meanwhile, Maggie’s dough is supple, almost like velvet. The difference in the dough is how long she hydrates it for. Maggie leaves her dough in the refrigerator after she makes it for at least 24 hours, and up to three days. By the time it’s ready to roll out, it’s a dream. We’ve done an experiment to see how the dough holds up after freezing it (and then thawing it in the refrigerator), and that yields an even silkier dough. If you have the foresight, make the dough in advance, and you’ll be amazed at how much easier the dough is to roll out.
Tip 2: Be Generous
Most recipes call for lightly dusting a work surface with flour before you get rolling. Keep your flour close so that you can constantly add flour to the counter to prevent sticking (also, see Tip 3). As soon as you notice the dough adhering to the counter, add more flour.
Tip 3: Embrace the Cold
There are so many great pie recipes that use summer fruit, and yet it’s really the worst time to bake one. The colder the dough, the easier it’ll be to roll out, and the flakier the crust will be. If you’re going to roll out dough in warmer weather, try to do it in the morning before the kitchen heats up. And please, don’t turn the oven on while you do this. The oven will make your kitchen far too warm, and the butter will start melting almost instantly, rendering it nearly impossible to roll the dough in a proper circle.
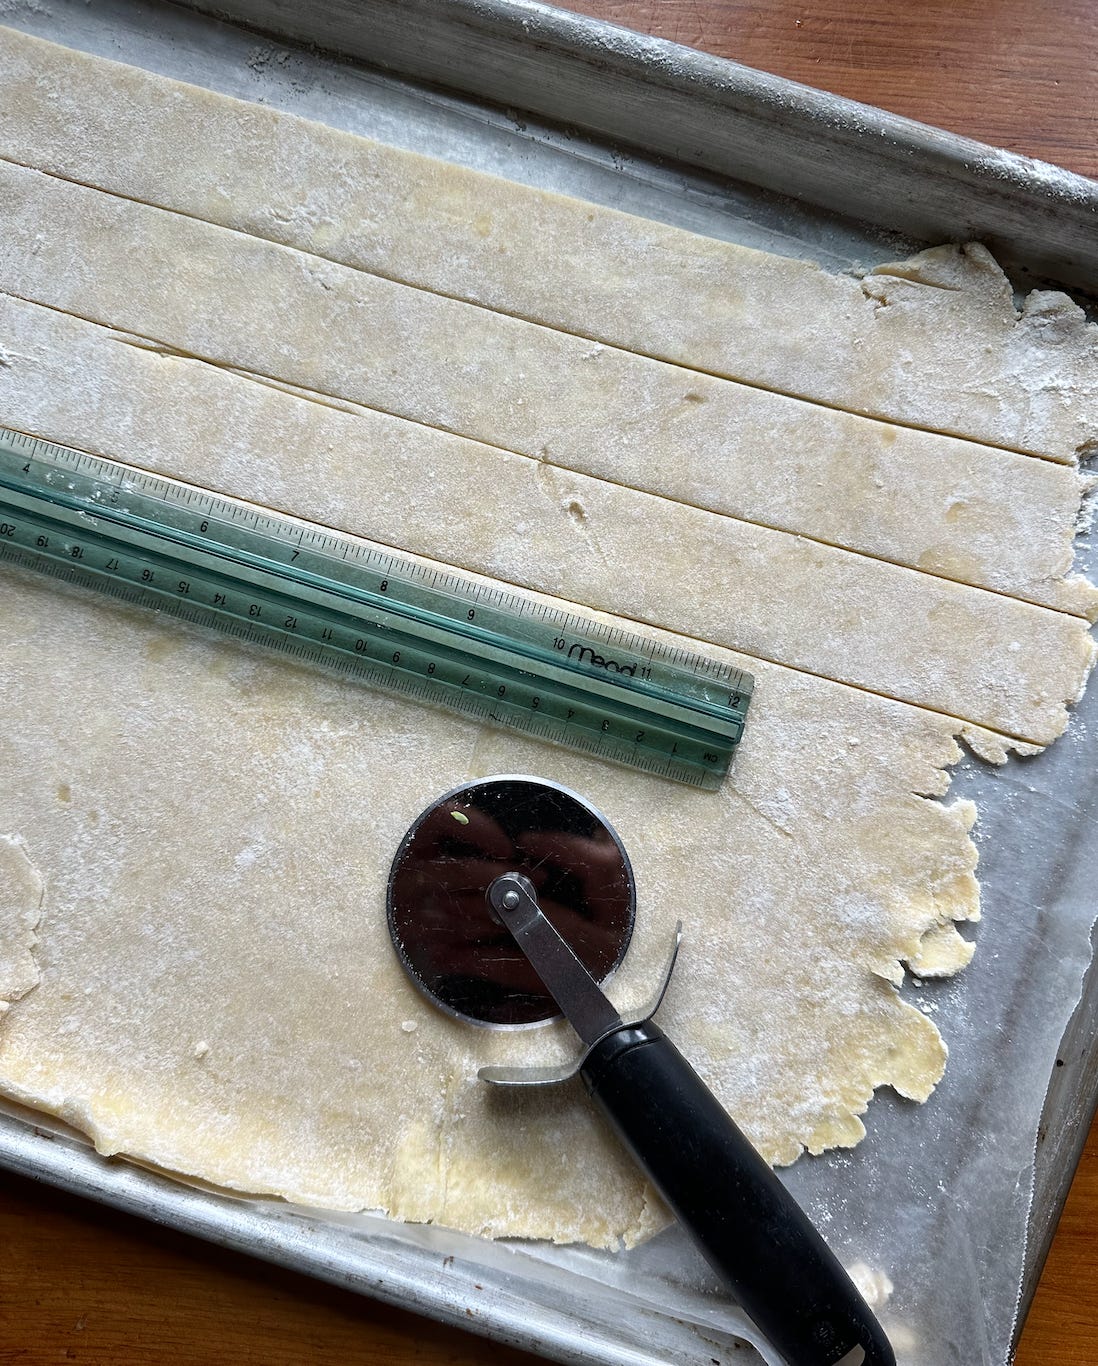
Tip 4: Roll Smarter, Not Harder
I feel like the natural instinct when you get hold of a rolling pin is to very dramatically roll it all the way across the dough in one fell swoop. Maggie starts by placing the rolling pin in the center of the dough and pushing out to the edge. She then turns it about 15 degrees and once again starts from the center of the dough. She repeats this motion until the dough is rolled out to the right size (the right size depends on the size of your pie dish, but you want enough dough to have at least 2 inches extra if you place the pie dish on top of it).
Tip 5: Hang Loose
Before this summer2, I struggled knowing where to trim the pie dough from the tin. I either trimmed it too short, resulting in a too-thin crust, or most often, I didn’t trim enough so that there was an embarrassingly hefty crust to bite through. Maggie gently tucks the dough into the pie tin and trims it just so it hangs down touching the counter, no more, no less. This will yield a crust that can be properly crimped, or is sturdy enough to hold a top crust.
Serves 8
Keep reading with a 7-day free trial
Subscribe to Side Dish to keep reading this post and get 7 days of free access to the full post archives.